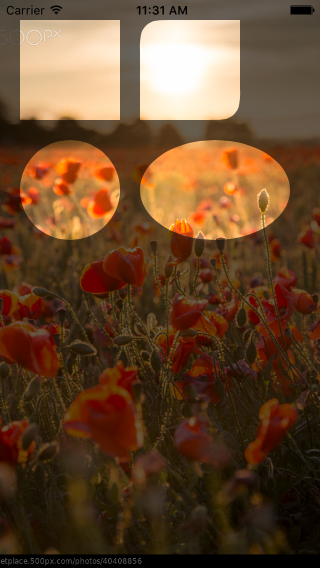
前阵子的工作中需要做一个局部透明的遮罩效果(如下图),Google 了半天,找到的方法都是使用一张图来遮罩之类的,效果并不理想。又继续翻找文档,发现了可以使用 UIBezierPath 来实现这个效果。
使用 UIBezierPath ,我们可以绘制出矩形、圆、圆角矩形之类的图形。我们想象有一个填充满颜色的 UIView,只要在中间抠掉我们想要的图形的颜色,就可以实现局部透明的遮罩效果。而 UIBezierPath 的 usesEvenOddFillRule 属性和 CAShapeLayer 的 fillRule 属性可以帮我们实现这个过程。
奇偶填充规则(Even Odd Fill Rule)指的是:在绘制 UIBezierPath 的过程中,会碰到同一个点被覆盖多次的情况。当一个点被覆盖偶数(0 属于偶数)次的时候,表示其位于图像外,而奇数次则表示位于图形内。位于图形内的点会被填充颜色,位于图形外的则不会。
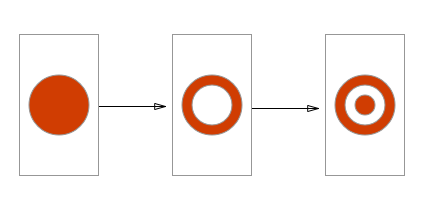
而我们要实现的效果的原理是,先用一个能填充满整个 UIView 的 UIBezierPath 做一次填充,然后在上面盖上我们想要的图形。这样,图形内的点会被覆盖奇数次,而图形外的点则会被覆盖偶数次。如此便能绘制出镂空的图形。
要实现该效果,首先我们需要一个可以填充满 UIView 的 UIBezierPath:
再创建几个需要被抠掉的形状的 UIBezierPath:
创建一个用于绘制 UIBezierPath 的 CAShapeLayer:
将上面的图形附加到初始的那个 UIBezierPath 里,并赋给 CAShapeLayer 的 path 属性:
最后,将该 CAShapeLayer 添加到指定 UIView 的 layer 的 subLayer 里面就可以。
上述代码实现的效果如下: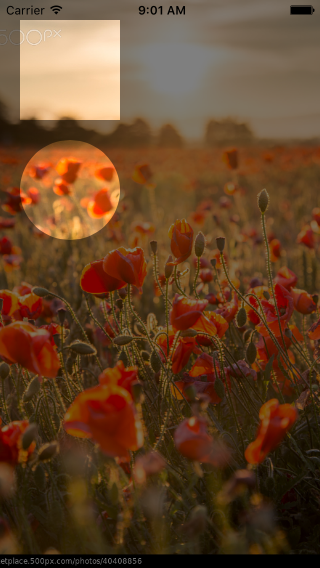
我花了点时间封装了一个可以复用此效果的 View,详细可以上我的 Github 查看:JYMaskView。